Creating Channels
Creating the list of channels for the DMR radio is the most cumbersome task. Remember, each repeater has two time-slots with possibly multiple talk-groups assigned to each time slot. For the sake of convenience, it is reasonable to define a channel for each talk-group you are interested for each time-slot on every repeater. Thus, instead of a single channel per analog repeater, you will likely define at least 3-4 channels per repeater in DMR.
To ease the burden of creating a lot of channels, qdmr implements some small features that should help you in creating these channel. One feature is the automatic retrieval of repeater input and output frequencies from repeatermap.de. This is a world-wide map of ham-radio repeaters.
When you enter your locator into the settings dialog, qdmr will provide you with a list of nearby repeater and fill in the input and output frequencies. This feature works for both, analog and DMR repeaters.
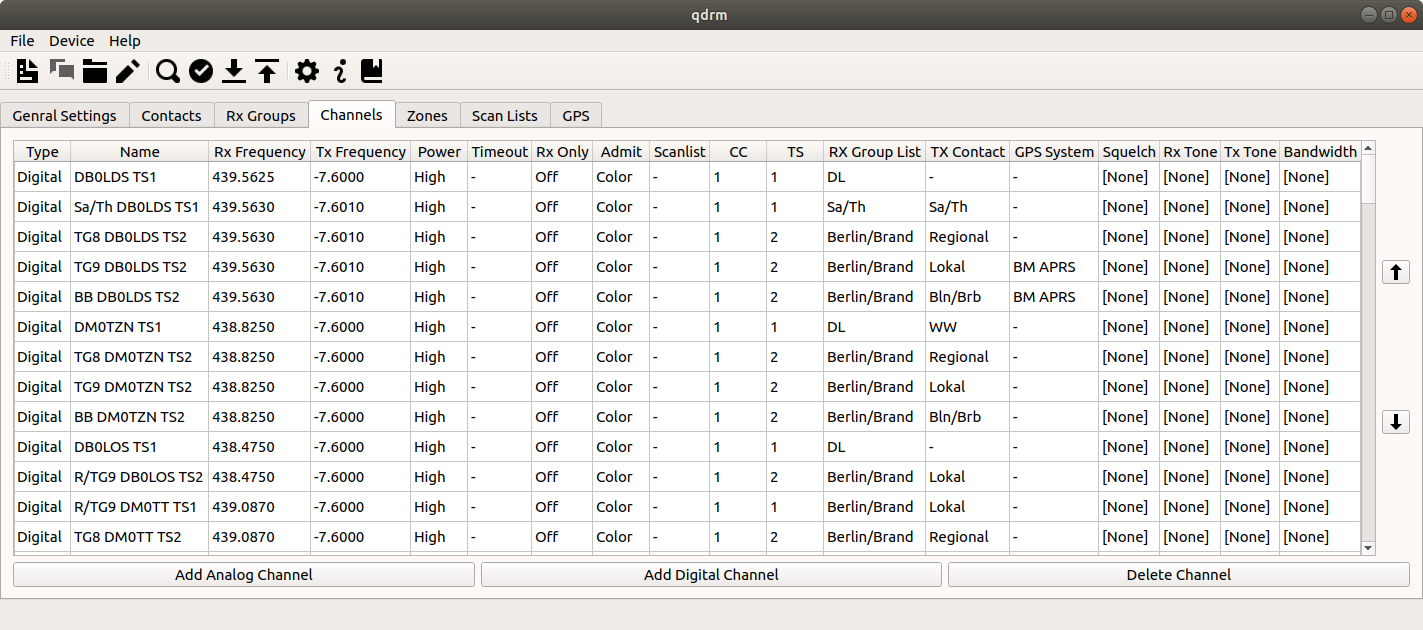
The Channels tab shows the list of all defined channels, irrespective whether they are analog or digital (DMR) channels. You may add an analog or digital channel by clicking on the Add Analog Channel or Add Digital Channel button on the bottom, respectively. You can also delete a channel, by selecting that channel in the list and clicking on the Delete Channel button at the bottom. You may move a channel up or down the list by selecting that channel and clicking on the arrow-up or -down button to the left, respectively. Finally you can edit a channel by double-clicking it in the list.
The number of channels usually grow fast and it becomes hard to find channels within the list. To search the list for any channel name or frequency, just hit Ctrl+F to open a search box.
Edit digital channels
When you double-click on a digital channel or click on the Add Digital Channel button, the digital channel editor dialog will be shown. This dialog allows you to edit or create digital channels.

The dialog is limited to the DMR-channel settings that are relevant for amateur radio. Thus, it is way smaller that the typical dialogs to edit DMR channels in commercial CPSs.
The Name, Rx and Tx Frequency fields contain the chosen name of the channel as well as the transmit and receive frequencies. The latter can be set automatically by using the repeater auto-completion feature: Start to enter the call-sign of a repeater and the RX/TX frequencies will be set using the information from repeatermap.de. For simplex-channels RX and TX frequencies must be identical.
The Power setting specifies the power used on that channel. For a nearby repeater, you may reduce the power. Tx Timeout (TOT) specifies the transmit timeout in seconds. This limits the continuous transmission time to this period. A value of 0 disables the timeout. Scan List allows to specify the scan list associated with this channel. If a scan is started on this channel, this scan list will be used. Each channel may have a different scan list.
The Tx Admit criterion specifies under which condition you are allowed to transmit on the channel. For DMR reapeater channels this should be set to Color Code, this means that you may only transmit if the radio received the correct color code of the repeater before. On simplex channels Channel Free should be chosen.
The Color Code specifies the color code of the repeater. For simplex channels, this should be set to 1. The Time Slot specifies the time-slot of the repeater for this channel. All repeaters have two time slots but different talk groups might be associated with each time slot. The Rx Group List specifies the list of group-calls you want to receive on this time-slot. The Tx Contact specifies the default contact you want to call on this channel when pressing the PTT button. Finally, the GPS System specifies how you location information is send over this channel (selecting None disables GPS for this channel).
Edit analog channels
When you double-click on an analog channel or click on the Add Analog Channel button, the analog-channel-editor dialog will be shown. This dialog allows you to edit or create analog (FM) channels.

The left column of field are identical to the digital channel dialog, that is Name, Rx and Tx Frequency, Power, Tx Timeout and Scan List.
Like for digital channels, analog channels may also have an Tx Admit criterion. Possible options are Always, Channel Free and Tone. For FM repeaters the Always option should be chosen to allow for a quick turn-around in a QSO. For simplex channels Channel Free should be chosen. The Squelch field specifies the squelch threshold. Rx and Tx Tone specify the CTCSS/DCS tones for this channel/repeater. The Rx Tone specifies the tone that is needed to open the squelch. The Tx Tone specifies the tone that gets transmitted (e.g., to open the repeater). Finally Bandwidth specifies the band-width of the transmission (i.e., 12.5 or 25 kHz).