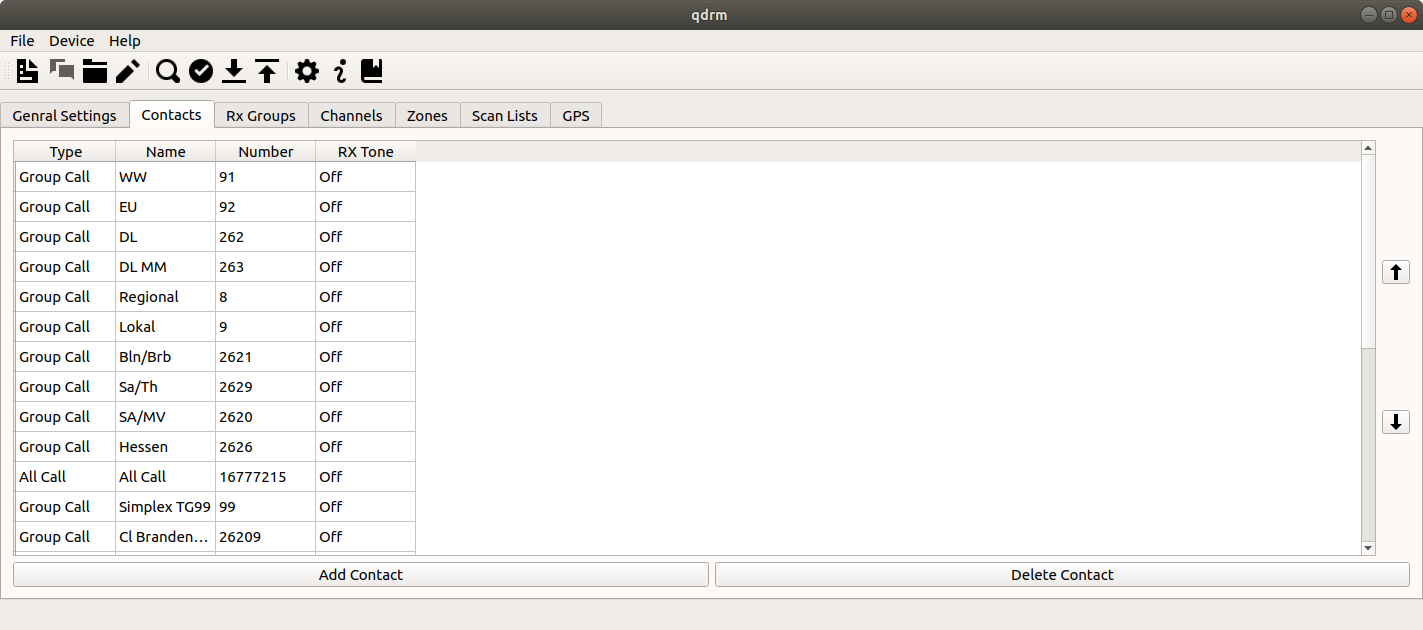
The second tab is the Contact List. Here all DMR contacts are defined, irrespective of their type. It is not only possible to define digital DMR contacts (i.e., private, group and all calls) but also DTMF contacts (and in future two-tone, five-tone contacts too). This eases the control of the EchoLink feature of repeaters.
 |
[D]
The contact list.
You may add a contact by clicking on the button at the bottom. You can also delete a contact by selecting the contact in the list and clicking on the button at the bottom. You may also reorder the contacts by selecting a contact in the list and use the and buttons on the right to move the contact up and down the list, respectively.
When you create a code-plug, the contact list should contain all talk groups and reflectors you are interested in, as well as a so-called All Call contact to the number 16777215. Additionally you may add private calls to several operators you know, as well as some service numbers.
 |
[D]
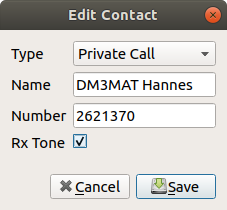
The new/edit DMR contact dialog.
When you click on the button or when you double-click a contact entry in the list, the Edit Contact dialog will appear. The first drop-down box allows to choose the type of the call. The possible options are Private Call, Group Call and All Call. The second entry is the name of the contact. Here any text can be entered. The third entry is the number of the contact. This entry gets disabled when All Call is selected as the call-type. Finally, if the last option Rx Tone is enabled, you will hear a ring-tone whenever this contact calls you.
Tip
qdmr tries to download the current list of all registered user DMR IDs. The contact dialog will use this information (once downloaded) to resolve call-signs to DMR IDs. Just start entering the call-sign into the name field and matching call-signs are shown.
The same holds true for Brandmeister Talkgroup names. That is, start typing the name of a talk group and a drop-down list of talk group names will appear for auto-completion. Select the talk group and its DMR ID gets set.
If Show device extensions is enabled in the settings dialog (see the section called “Application Settings Dialog”), a tab bar is shown at the top. There you can also access the device specific settings for contacts.
 |
[D]
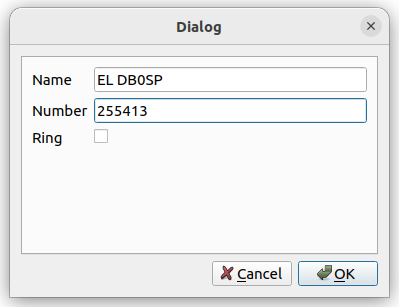
The new/edit DTMF contact dialog.
Beside DMR contacts, the contact list may also contain analog DTMF contacts. You can add a new DTMF contact by clicking on the button. This will open the Edit DTMF contact dialog (see above). This is a rather simple dialog.
Name specifies the name of the DTMF contact, while Number specifies the DTMF number. There, any DTMF number can be entered, this includes symbols like *, #, A-D. The Ring option specifies whether the radio should ring if a call by this contact is received.