Scan lists are simple lists of channels that are scanned sequentially, when scanning is started. A ScanList may be associated with an analog or digital channel (see the section called “Creating Channels”).
Note
For many radios, you need to associate a scan list with a channel (see the section called “Creating Channels” above) in the analog or digital channel edit dialog. This determines which scan list is used, when a scan is started on a particular channel.
 |
[D]
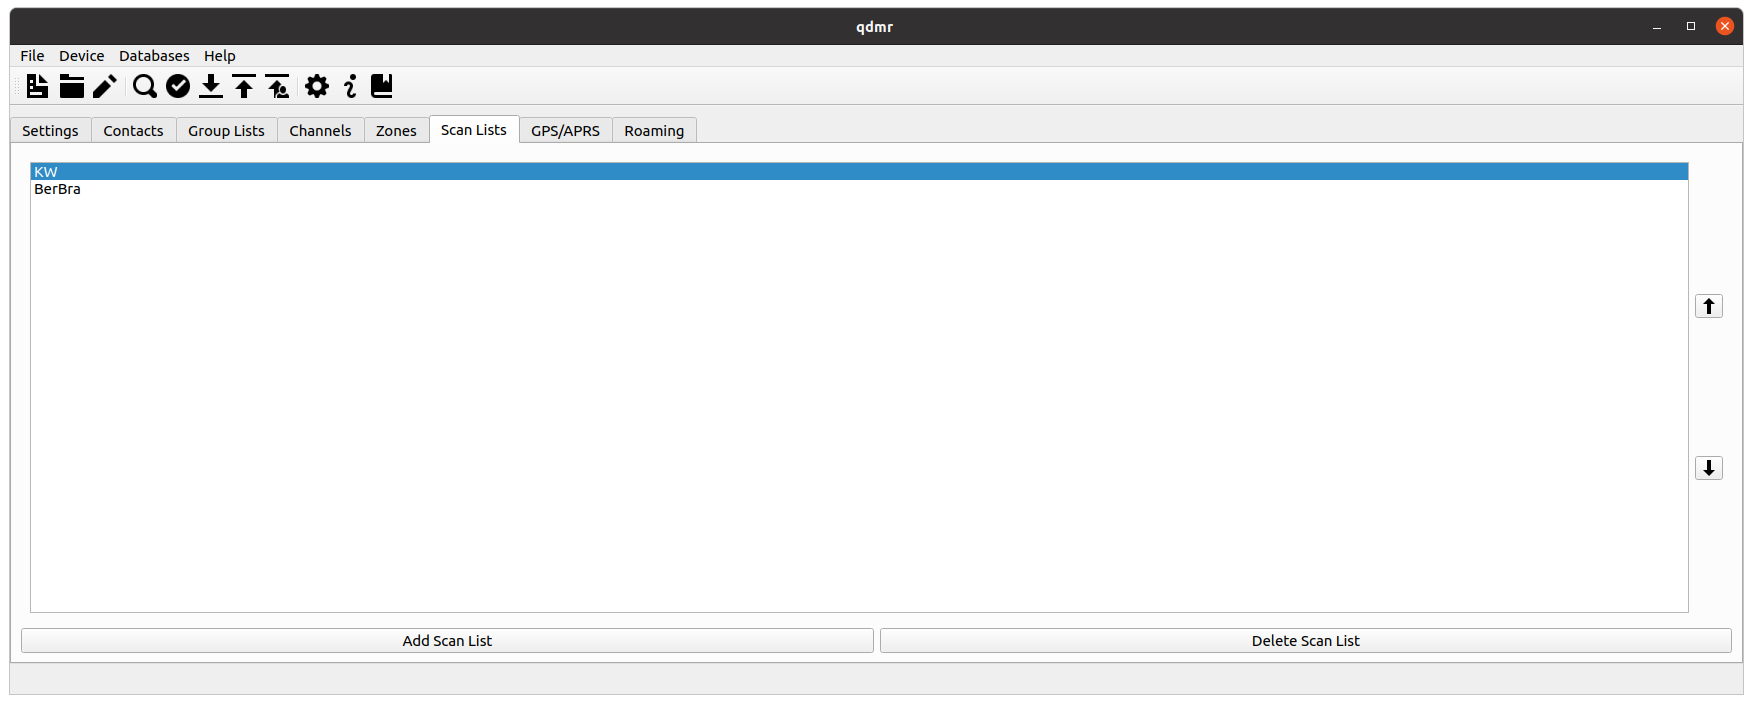
The list of scan lists.
A new scan list can be created by clicking on the button. A scan list can be deleted by selecting the scan list and clicking on the button. The order of the scan list can be changed by selecting a list and moving it up/down using the and buttons on the right.
Double-clicking on a scan list or clicking the button will open the scan-list edit-dialog. This dialog allows to alter/assemble the scan list by adding, removing or reordering the channels in the scan list.
 |
[D]
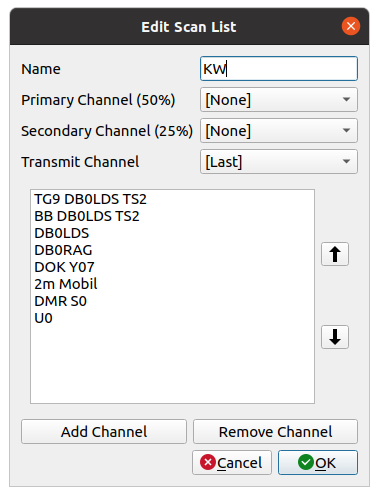
The scan-list editor.
By double-clicking an existing scan list or clicking on the button, the scan-list dialog opens. The Name field allows to specify the name of the scan list.
The optional Primary and Secondary Channel fields allow to specify channels that are visited more frequently. The Primary Channel will be visited 50% of the time. That is, after a channel of the scan list was visited, the primary channel is visited again, and after that, the next channel from the scan list is visited. In the end, the primary channel is scanned half of the time. The secondary channel is similar but gets visited only 25% of the time. The drop down list allows to select none, any channel or the Selected channel. The latter refers to the channel, the scan started on.
The optional Transmit Channel or Revert Channel specifies the channel to transmit on during a scan. Here none, any channel, the selected channel and also the Last channel can be chosen. The Last channel refers to the last active channel on the scan list. This allows to answer a heard call during a scan.
Channels can be added to the scan list by clicking on the button at the bottom. Similarly, channels can be removed by selecting them and clicking on the button. Like for all other lists, the channels can be moved around within the list by selecting channels and using the and buttons to the right.
If Show Commercial Features is enabled in the settings dialog (see the section called “Application Settings Dialog”), a tab bar is shown at the top. There you can also access the device specific settings for the scan list.